
How to Make an Alternative Encaustic Brush from Flashing
When I was doing my demo at the Canadian Encaustic Conference in September, I mentioned my DIY Encaustic Brushes made from flashing material, which got a lot of interest. As promised, here is the how-to, which was originally posted on Art Bite Blog in 2018 and is now being posted for another surge of interested DIY brush-makers. Have fun!
I first began using alternative brushes about 2 years ago and have gradually almost given up traditional brushes altogether, although they still serve a purpose for now. With the alternative brushes the paint is scooped off of the palette and applied like frosting on a cake. The painting process is much more free, fast and FUN! I've even renamed my paint process, 'Smashing Paint' or 'Paint Smash'. Since using these brushes, I don't stress over painting like I used to and I uncover the most fascinating forms and patterns when I scrape away the layers after the wax is applied this way. It's amazingly fun!
I'm always looking for new and innovative ways of working and I first experimented with alternative encaustic brushes using flexible paint scrapers, but soon found them clunky and difficult to handle. I then moved on to Venetian plaster tools (no longer available), which I still use, but I find them a bit stiff and I really only like the medium and small sized ones. Many years before this, I had purchased flexible clay scrapers-the real thin ones. I had originally purchased them to use as scrapers, but they were way to flimsy so I just threw them in my tool drawer and there they sat for years until I was looking for some flexible metal. To protect my fingers from the heat, I created a thick padding of duct tape and Viola! I finally found a use for those scrapers! They are perfect brushes in that the application is direct-there is no handle, no separation between your hand and the brush itself, which gives you both more and less control....more because its direct and less because the brush doesn't hold the paint the way a traditional brush does. This may be frustrating for some, but it is sort of the reason for using alternative brushes in the first place.
After using the clay scrapers for a while, I became frustrated with their limited size and shape so that's when I started making my flashing brushes. I can make any size or shape with some tin snips and a little duct tape, which averages less than a dollar per brush. Just a warning, that these brushes are crude and rude. But...I'm saving tons of money and making cooler work! Now you can, too, by following the simple instructions below. Scroll down below the instructions to see some brush images, works in progress and finished work made with these brushes. Have fun making and please share images of the brushes you've made!
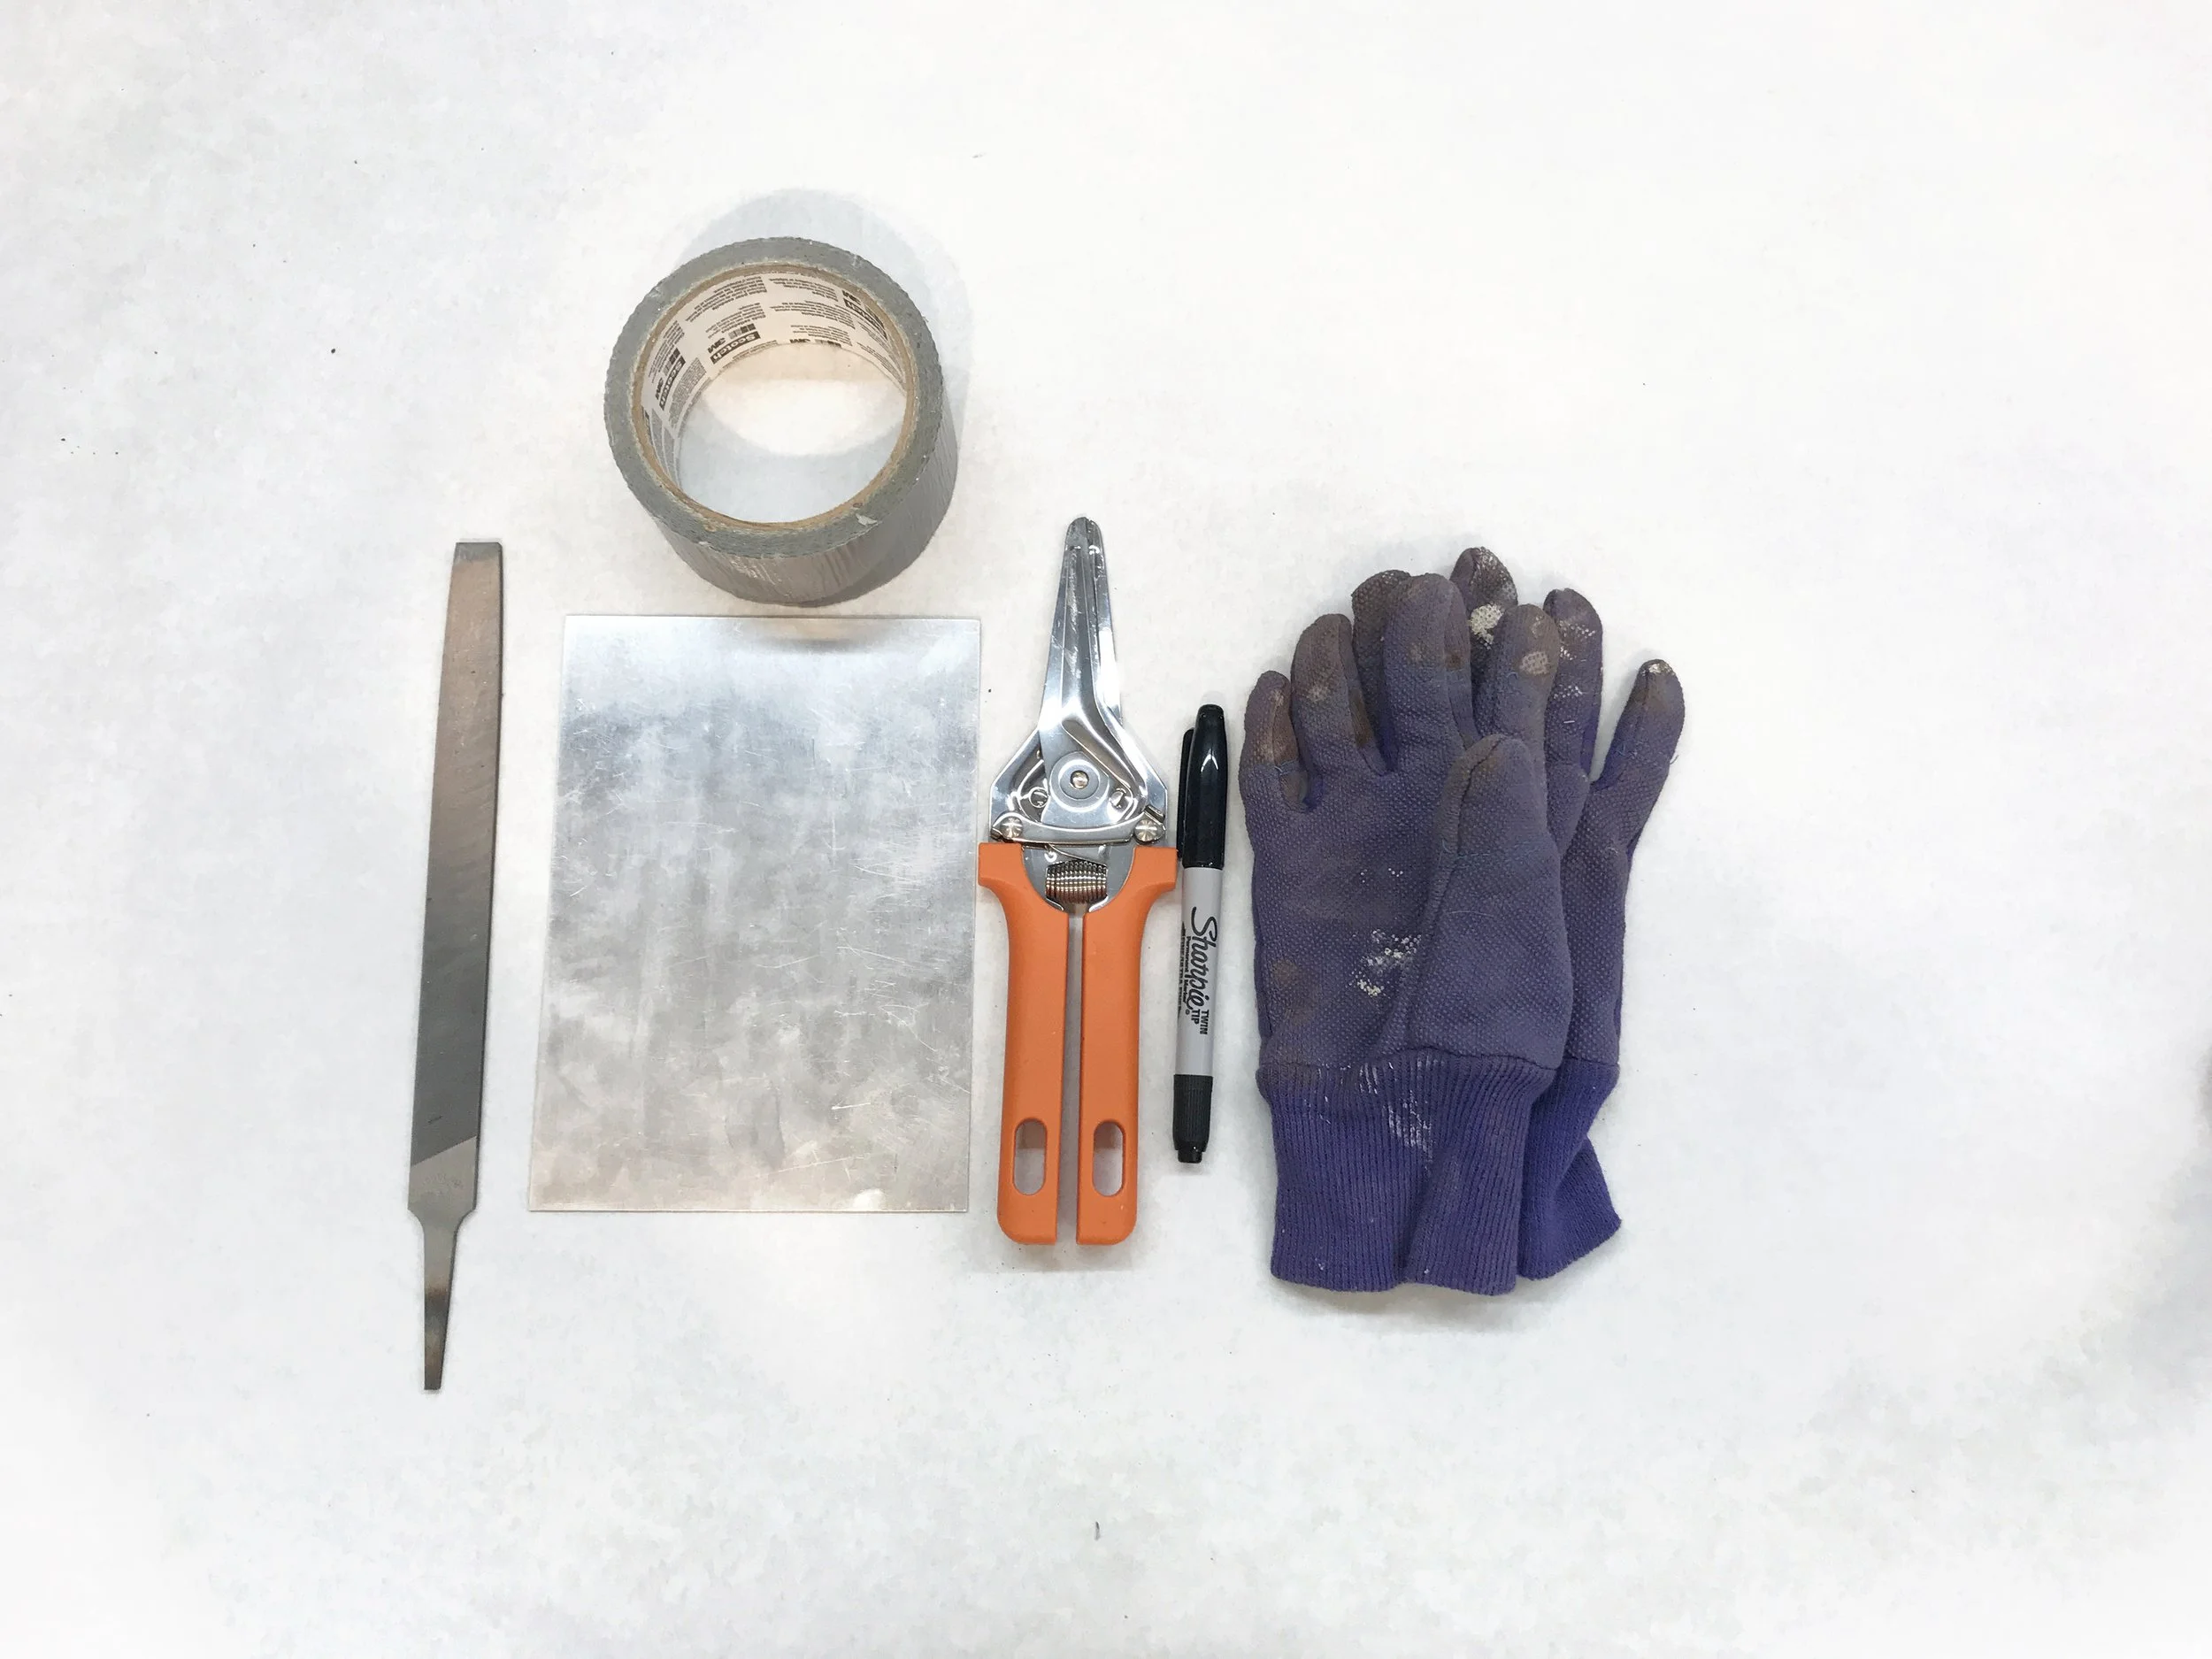
What You Need
A small sheet of flashing material available at any home improvement store
Sharpie
Thick work gloves
A metal file
Tin snips
Duct tape
How-To
Work on a clean surface so you can keep an eye on any tiny metal shards.
Draw out your brush shape on the flashing with the Sharpie. You could also cut freehand, but the tin snips are clunky so it's best to have a guide. Start simple, you can get more complex as you make more brushes. Also, make sure to leave an inch or two at the bottom of the brush for a 'handle'. (Image 1)
Put your work gloves on to protect yourself from sharp edges
Use the tin snips to cut the brush along your drawn lines. Watch those scraps, they are sharp!! (Image 2)
File the edges of your brush down a bit so they aren't so sharp and you're ready to make your handle. (Image 3)
Wrap the bottom of the brush several times with duct tape-at least 3-4 layers and you're ready to paint! (Image 4)
Make sure you clean up those tiny metal shards with a dustbuster or something that picks up teeny things, they really hurt if they get into your skin.
Finished brush (Image 5)
Scoop the paint and apply it to your painting surface like you’re frosting a cake. (Images 6-8)


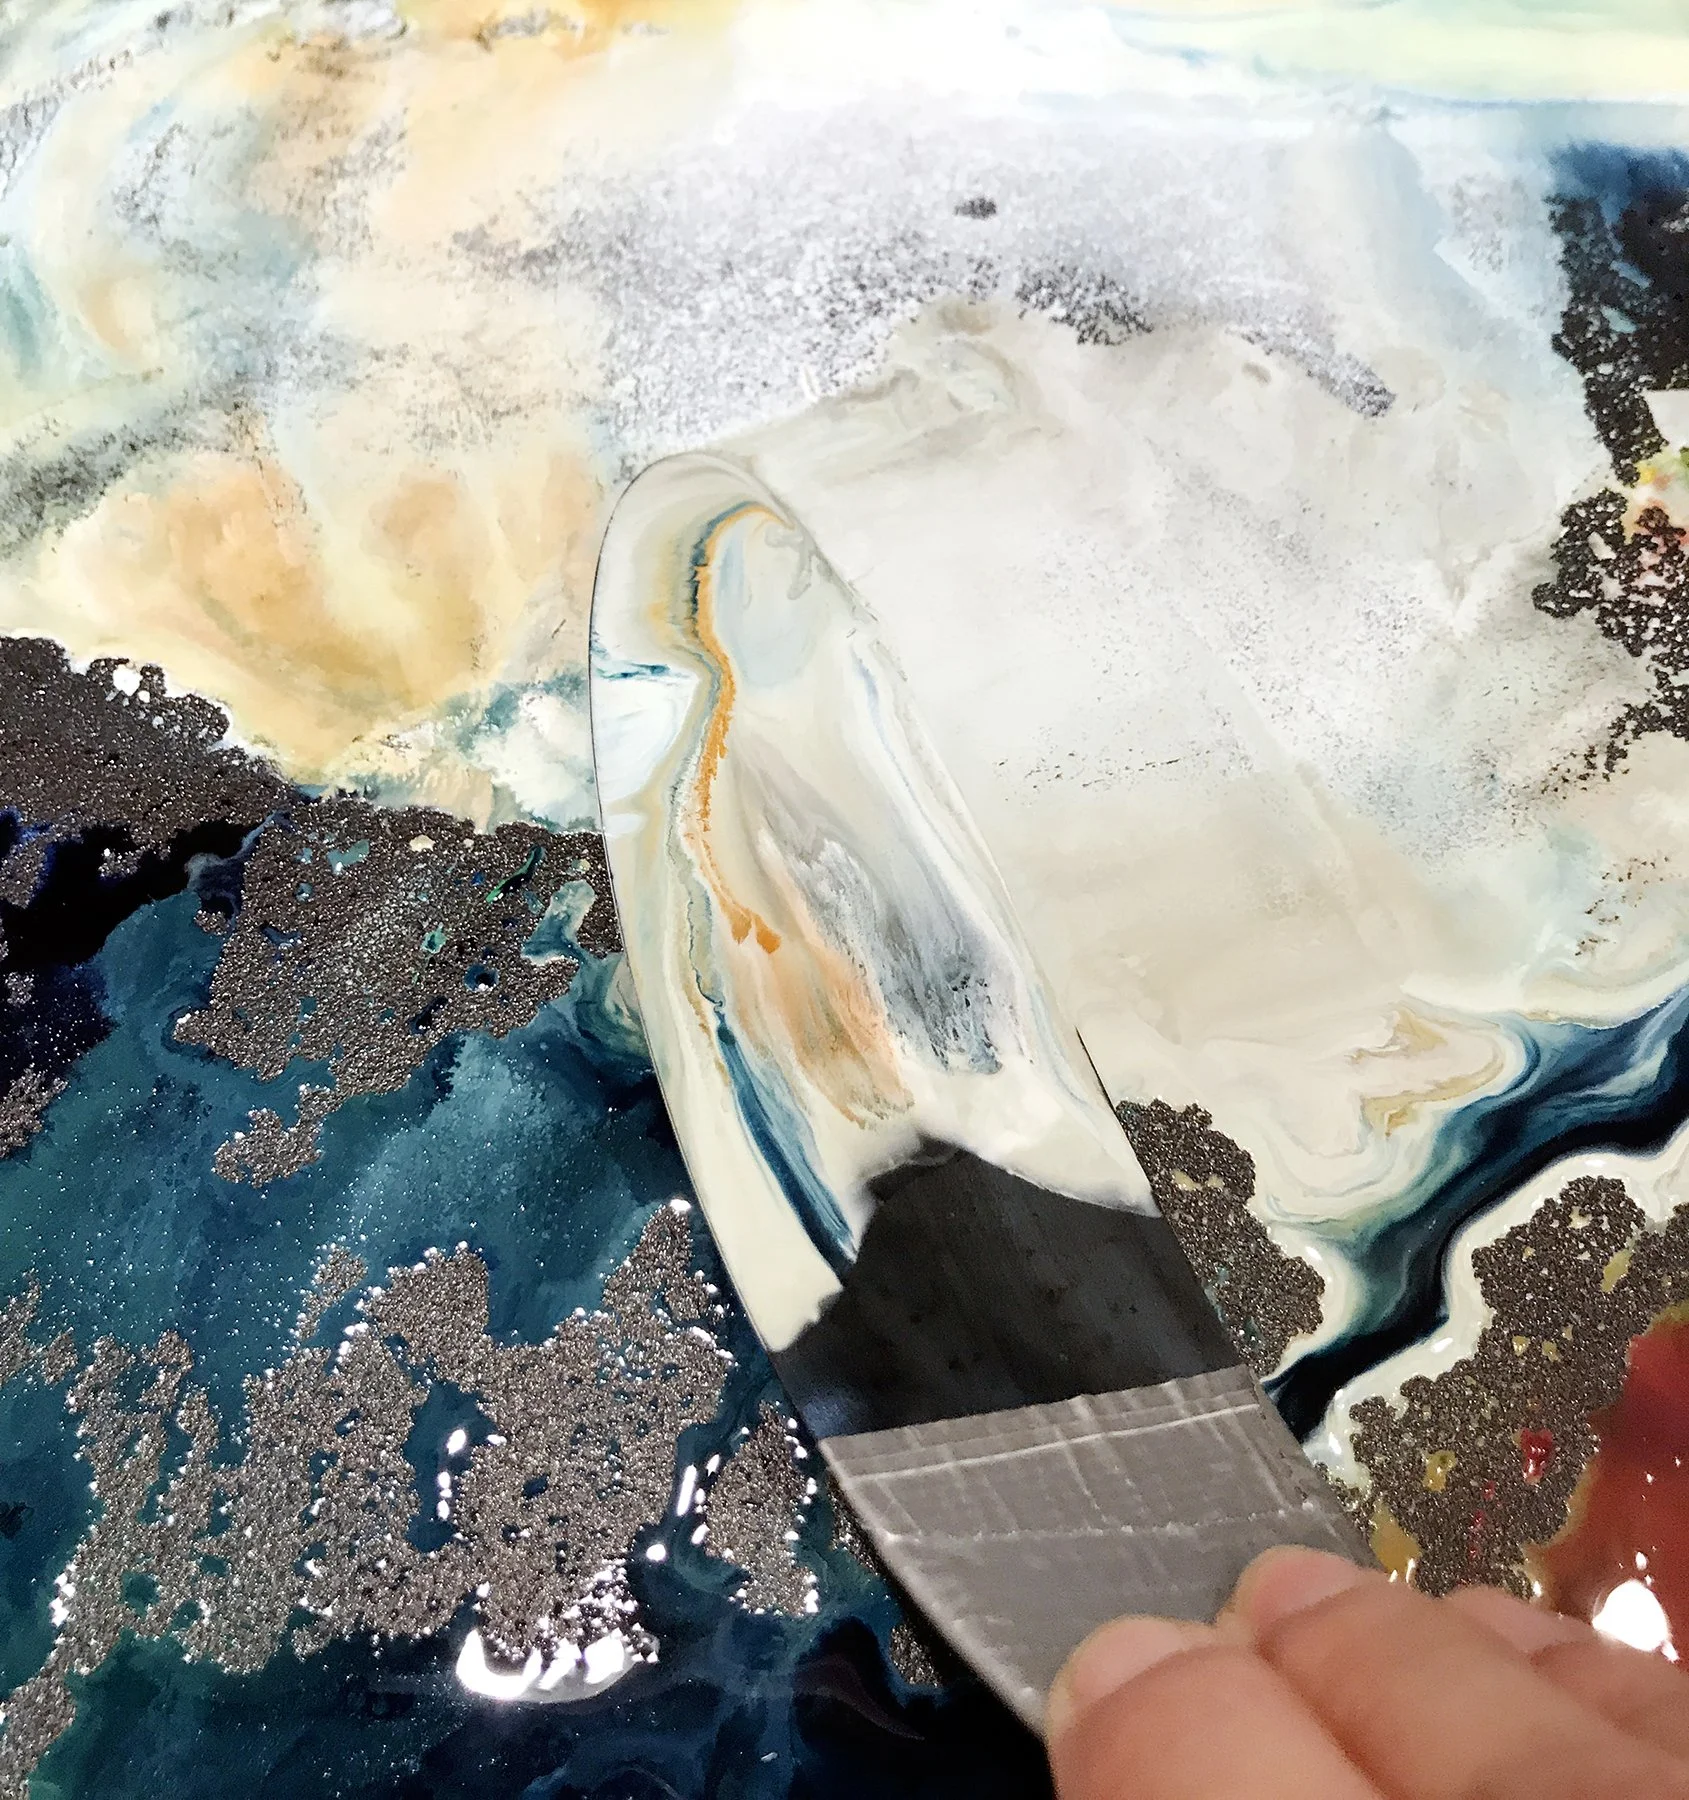

Encaustic Texture Examples Made with DIY Brush


